Interested in helping with a community I manage? Interact with posts.
Mantra: “We should focus our actions, time, and resources on Direct Action, Mutual Aid, and Community Outreach… No War but Class War!”
FYI: Human, check reCAPTCHA log /s
- 13 Posts
- 72 Comments


 23·21 days ago
From watching and reading independent journalists, owner-class media, and more, it seems, IIRC, a good amount of his supporters are for Trump.
It would help third parties if they left the duopoly, though.
https://www.nbcnews.com/politics/2024-election/rfk-jrs-exit-help-trump-according-polls-rcna167539
Policy, many videos where Robert talks about details.
In the end the duopoly and RFK Jr. support funding more forever wars and genocides.
Here ya go:
That initial thought came to mind when I learned about the information below, but I am not sure:
The causes aren’t clear, but one study found that 65% of people with the condition previously had measles or mumps – compared with the US national average of 15%.[1]
He supports the genocide, same as the duopoly, so deal breaker as well.
Fuck, he sounds like absolute shit
Here ya go:
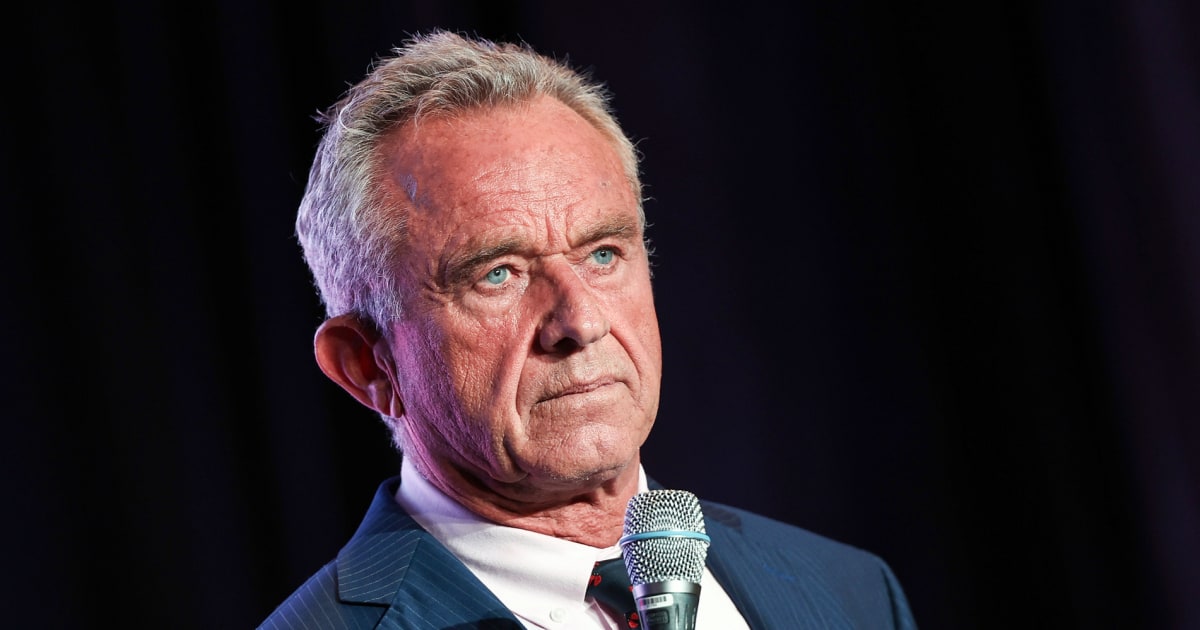
Anyone following the US presidential race may have noticed independent candidate Robert F. Kennedy Jr. has a particularly harsh-sounding voice. The cause is a neurological condition called spasmodic dysphonia.
Spasmodic dysphonia, also known as laryngeal dysphonia, often results in a shaky, tight or strained-sounding voice. It does not affect other functions of the vocal cords, such as laughing, crying or shouting.
It affects about one in every 50,000 people – with women being more prone to it than men. It usually develops between the ages of 30 and 50.
The causes aren’t clear, but one study found that 65% of people with the condition previously had measles or mumps – compared with the US national average of 15%.[1]
The independent presidential candidate recounts those times somewhat wistfully, telling interviewers that he “can’t stand” the sound of his voice today — sometimes choked, halting and slightly tremulous.
The cause of RFK Jr.’s vocal distress? Spasmodic dysphonia, a rare neurological condition, in which an abnormality in the brain’s neural network results in involuntary spasms of the muscles that open or close the vocal cords.
“I feel sorry for the people who have to listen to me,” Kennedy said in a phone interview with The Times, his voice as strained as it sounds in his public appearances. “My voice doesn’t really get tired. It just sounds terrible. But the injury is neurological, so actually the more I use the voice the stronger it tends to get.”[2]
He also pretended to be anti-war while fully supporting Israel.
Genocide is a deal-breaker for some.
Interesting.
 84·27 days ago
IMO: tribal thinking.
It comes down to “they do not think like I want them to or they won’t agree with me, so I will downvote posts.”
Controversial topics are even more downvoting just to downvote.
The self-built echo chambers are already constructed; self-censorship and anything outside of their views and sources are dismissed, labeled, and smeared so as to not think about the information being shared.
It happens everywhere; the status quo is welcomed, while anything outside of it will seem controversial or extreme.
 64·1 month ago
Are you holding ‘Option’ down when it boots? So as to access the GNU GRUB menu?
Quick search:
- First look: Linux Mint 21 beta, on a 10 year old Mac! [24:14 | JUL 17 2022 | Veronica Explains]https://youtu.be/D7wOcIvWdxc&t=210
Chapters:
- 00:00 Intro
- 00:26 Why use Linux Mint?
- 03:29 Booting from, and playing with, the live USB
- 06:51 Release notes and installing Linux Mint
- 09:50 First impressions of the new Linux Mint install
- 10:56 Walking through the “First Steps” guide
- 14:45 Updating for the first time and playing with the Panel
- 15:53 System settings in Linux Mint
- 16:32 Software Manager and installing OBS from Flatpak
- 18:21 Customizing the Panel (taskbar)
- 19:52 Trying OBS from the Flatpak, testing the camera
- 20:24 Other applications shipped with Linux Mint
- 22:56 Parting thoughts
Edit2: added below; forgot yt link, added
Another quick search:
- Noob Guide to Installing Linux Mint on 2014 MacBook Air [07:47 | FEB 05 2024 | jailbrayk] https://youtu.be/x4nbafBOB4Y
This process should work on any Intel Mac pre 2018 (without T2 security chip & secure boot). Thanks for the suggestion to install Linux on this old MacBook Air! It has brought new life to this old computer and I am really enjoying getting to know Linux, as I have never really used Linux in this capacity. Let me know if you would like a more in depth video of how I set up my Linux environment!
Edit3: improved wording a bit, and added info below; forgot to add this edit
Legalize and regulate.
I share this view with other issues our society faces as well.
Edit: forgot why.
Why:
Sex work as well as drugs will never be outlawed or enforced fully; looking at drugs, it is used as an excuse to jail the working class for slave labor as well as other things when you follow the money.[1]
Neither slavery nor involuntary servitude, except as a punishment for crime whereof the party shall have been duly convicted, shall exist within the United States, or any place subject to their jurisdiction.[2]
[1] The Wire - Daniels Follows the Money | 01:34 | https://youtu.be/9PaBt441FBQ ↩︎
[2] https://constitution.congress.gov/constitution/amendment-13/ ↩︎
Oh, TIL.
Thanks for letting us know!
Great points and awesome of you to bring it up!
Don’t forget:
- Jerboa
- Voyager
Edit2: added a reply to question; fomat to seperate quotes
“A man chooses. A slave obeys.”
“We all make choices, but in the end… our choices make us.”
Quotes are by Andrew Ryan.
Andrew Ryan is a fictional character in the BioShock video game series developed by Irrational Games. He serves as the secondary antagonist in BioShock, and also appears in its follow-ups BioShock 2 and BioShock Infinite: Burial at Sea.
“Que Mala.”

Oh, thanks for the link!
Edit: added a bit of information below for those interested
A/B testing (also known as split testing or bucket testing) is a methodology for comparing two versions of a webpage or app against each other to determine which one performs better. A/B testing is essentially an experiment where two or more variants of a page are shown to users at random, and statistical analysis is used to determine which variation performs better for a given conversion goal
In an A/B test, you take a webpage or app screen and modify it to create a second version of the same page. This change can be as simple as a single headline, button or be a complete redesign of the page. Then, half of your traffic is shown the original version of the page (known as control or A) and half are shown the modified version of the page (the variation or B).
The following is an A/B testing framework you can use to start running tests:
- Collect data:
- Identify goals:
- Generate test hypothesis:
- Create different variations:
- Run experiment:
- Wait for the test results:
- Analyze results:
You don’t see a star or bookmark symbol on comments?
Might be app you are using?
They are always testing changes to different groups of people.
Not too sure how that works, but if you wnat the old layout you can add extensions.
Quick search results in:
How to Undo YouTube’s Terrible New Layout [Jake Peterson | May 23 2024 | LifeHacker] https://lifehacker.com/tech/how-to-undo-youtubes-terrible-new-layout
How to Get Old YouTube Layout Back: Simple Steps for Nostalgic Navigation [July 18, 2024 | bytebitebit] https://bytebitebit.com/tips-tricks/how-to-get-old-youtube-layout-back/
Well, that can also be said for those that consume MSM vs. those on social media and the internet.
There are also groups that voted for Obama, then turned around and voted for Trump.
Obama: Hope.
Trump: Drain the swap.
They might have learned to never trust a politician at face value.
Or, hear me out:
Maybe, just maybe, it is due to the continuation of the status quo, similar to warmonger Hillary Clinton.


Cross-post comment:
[1] https://www.jeffgeerling.com/blog/2024/new-2gb-pi-5-has-33-smaller-die-30-idle-power-savings ↩︎